


PIN and touch for encrypted storage, login, screen unlock, sudo, and polkit
Lab work conducted November 3, 2026
Prepared November 3, 2026
Why I built this lab
My goal wasn't to eliminate very strong, high-entropy passwords or recovery credentials. It was to virtually eliminate their use during normal daily operations, reserving them for emergencies such as lost security keys, hardware failures, or other serious recovery situations. I wanted to rely on either my primary or backup FIDO2 security key for nearly all routine authentication—ideally 99% of the time or more.
A password that isn't routinely entered presents fewer opportunities for someone watching or for keylogging malware to capture it. Although a keylogger could still capture a security key's PIN, knowing that PIN alone doesn't ordinarily replace possession of the registered hardware key. Another important advantage is the physical-presence requirement. Even if a registered security key remains inserted in the computer, someone attempting to authenticate remotely with a stolen PIN generally cannot complete a new authentication that requires physically touching the key. This provides another layer of protection, although it does not prevent attacks against an already compromised or unlocked system, nor does it eliminate the risks associated with retained password fallbacks. For me, minimizing routine password exposure while preserving strong emergency recovery options is a practical application of defense in depth.
Policy boundary. This lab accepts either a registered key with its PIN and touch or the retained password fallback. It does not require a key in addition to the account password. Someone who knows a valid fallback password can still authenticate without the key. The benefit here is reduced routine password use, not removal of every password-based route.
The two Yubico Security Key NFC devices completed the reported tests across all four USB ports of one Dell Latitude E6430 ATG. Both Identiv uTrust devices enrolled successfully and sometimes unlocked the disk, but later disk-unlock tests were intermittent. I cannot recommend those two uTrust devices for dependable boot unlocking on this machine. Their cause of failure remains unresolved.
This work took place on November 3, 2026, during my first day testing Fedora Linux 45. Several hours of successful testing with the Yubico keys are encouraging. They are not a long-term reliability study or a compatibility guarantee for other systems.
Use a disposable lab machine
Do not perform this procedure on a production machine. Storage selection during installation can erase data; authentication and boot changes can lock you out. Back up important data, retain the disk passphrase and account password, and have working recovery media before attempting the lab. Use these steps at your own risk.
How to use this guide
Follow Steps 1 through 10 in sequence. Read the device-identification gate before copying any disk command. Each stage includes an observable success check. The final sections record recovery behavior, failures, and the limits of the experiment. The companion article is a shorter account of the findings; this guide contains the repeatable procedure.
What was tested
| Component | Lab record |
| Computer | Dell Latitude E6430 ATG; one physical test machine |
| Operating system | Clean Fedora Linux 45 Workstation installation; GNOME with GDM |
| Kernel captured after update | 7.2.15-300.fc45.x86_64 |
| systemd captured in boot log | 262.1-1.fc45 |
| PAM packages captured | pam-u2f and pamu2fcfg 1.4.0-8.fc45 |
| Storage | Samsung SSD 870 EVO 2 TB; LUKS2 with Btrfs for root and home |
| First Yubico key | Security Key NFC, USB-A; firmware 5.7.4 |
| Second Yubico key | Security Key NFC, USB-A; firmware 5.8.0 |
| Other keys retained | Two Identiv uTrust FIDO2 security keys |
| Authentication policy | Key PIN and touch; account-password fallback retained |
I use “YubiKey” informally in the lab conversation. The captured device information identifies these two devices as Yubico Security Key NFC models. This is not a test of every YubiKey product or every firmware release. No uTrust firmware revision was established in the record.
Two enrollments for each physical key
Disk unlocking and operating-system authentication are separate paths. A LUKS enrollment authorizes the key to unlock the encrypted volume. A PAM registration authorizes it for the local account. Completing one does not complete the other. Polkit and sudo used the existing shared PAM configuration; no separate key profile was added to each application.
My earlier Fedora 42 article covered Cinnamon and LightDM (Murphy, 2025). This installation used GNOME and GDM, distribution packages, and authselect. Do not combine the earlier article’s manual configuration with this procedure.
The original November 3 lab did not configure SSH, remote desktop, browser passkeys, a TPM unlock policy, measured boot, or new authorization rules. The optional SSH extension at the end was completed on November 17. Full disk encryption here means the main system and user-data volume is encrypted; the EFI and /boot partitions remain outside it.
Step 1 Install Fedora Linux with encrypted storage
I performed a clean installation rather than upgrading the previous system. The recorded image was Fedora-Workstation-Live-45-1.4.x86_64.iso. I checked the downloaded image against its published checksum and wrote the installer with Rufus 4.7.2231 using DD image mode. Use the checksum supplied for the exact image you download; this guide does not publish a reusable checksum value.
The boot-media check failed during the lab. I proceeded with the direct live-boot option on this disposable machine. That was a lab exception, not a resolved diagnosis or a recommended shortcut. If your media check fails, stop and recreate and verify the installation medium before following this guide. A matching downloaded-image checksum alone does not establish that the written USB medium passed verification.
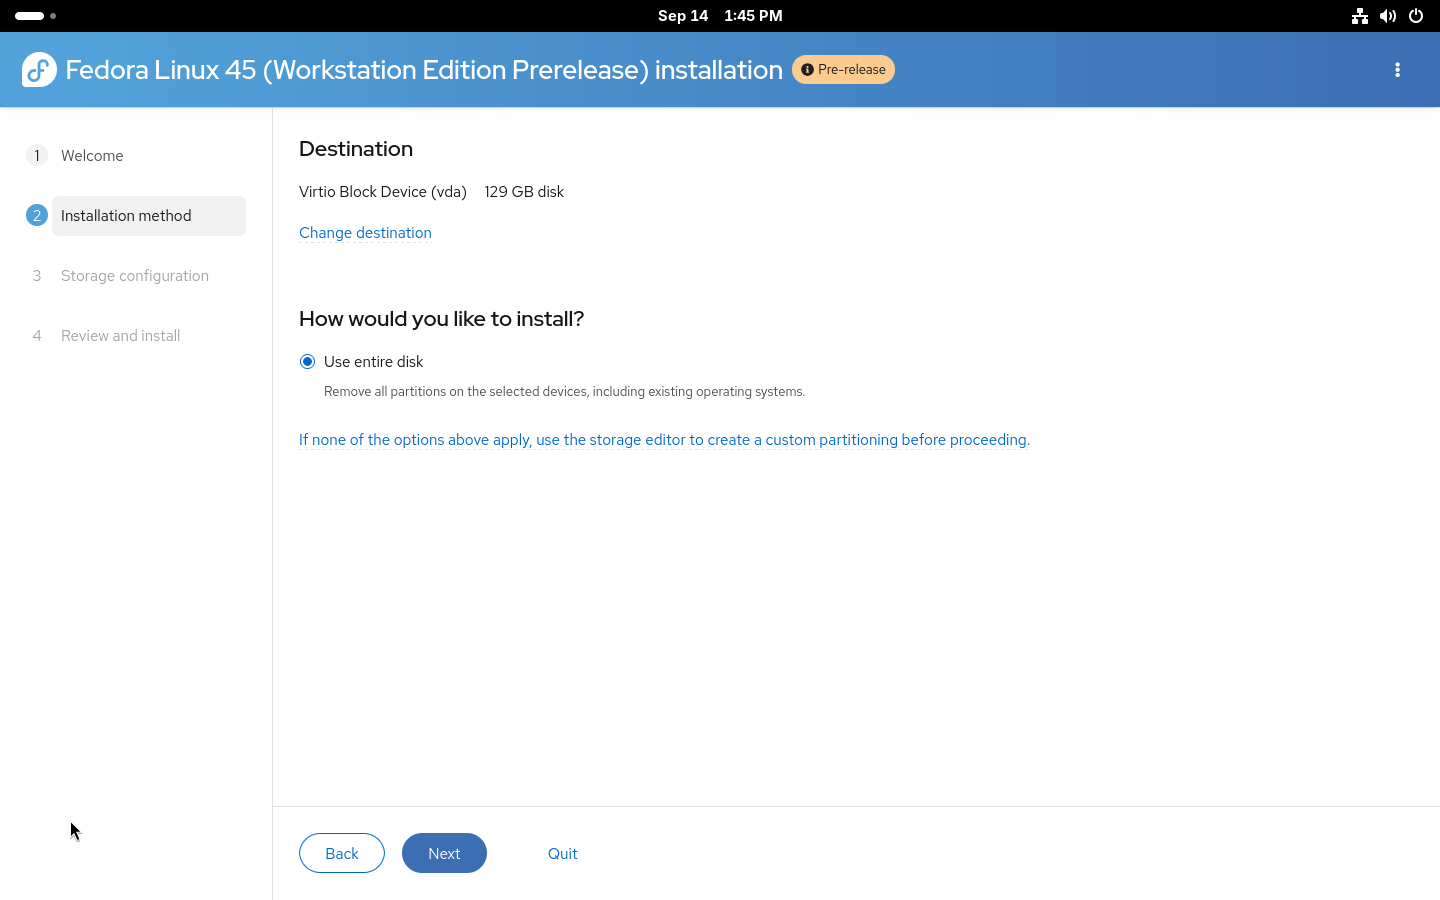
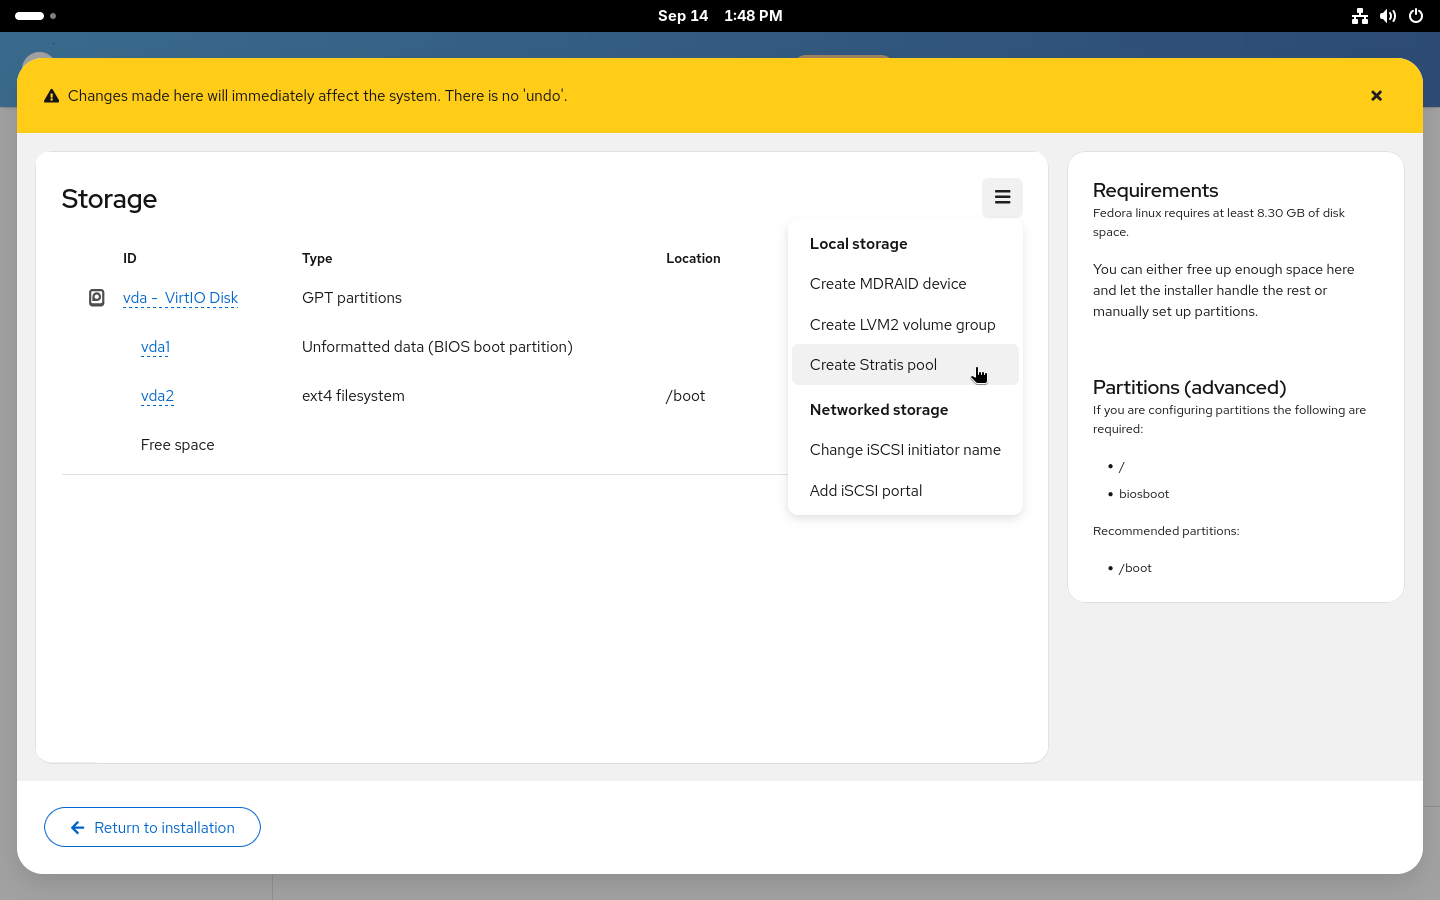
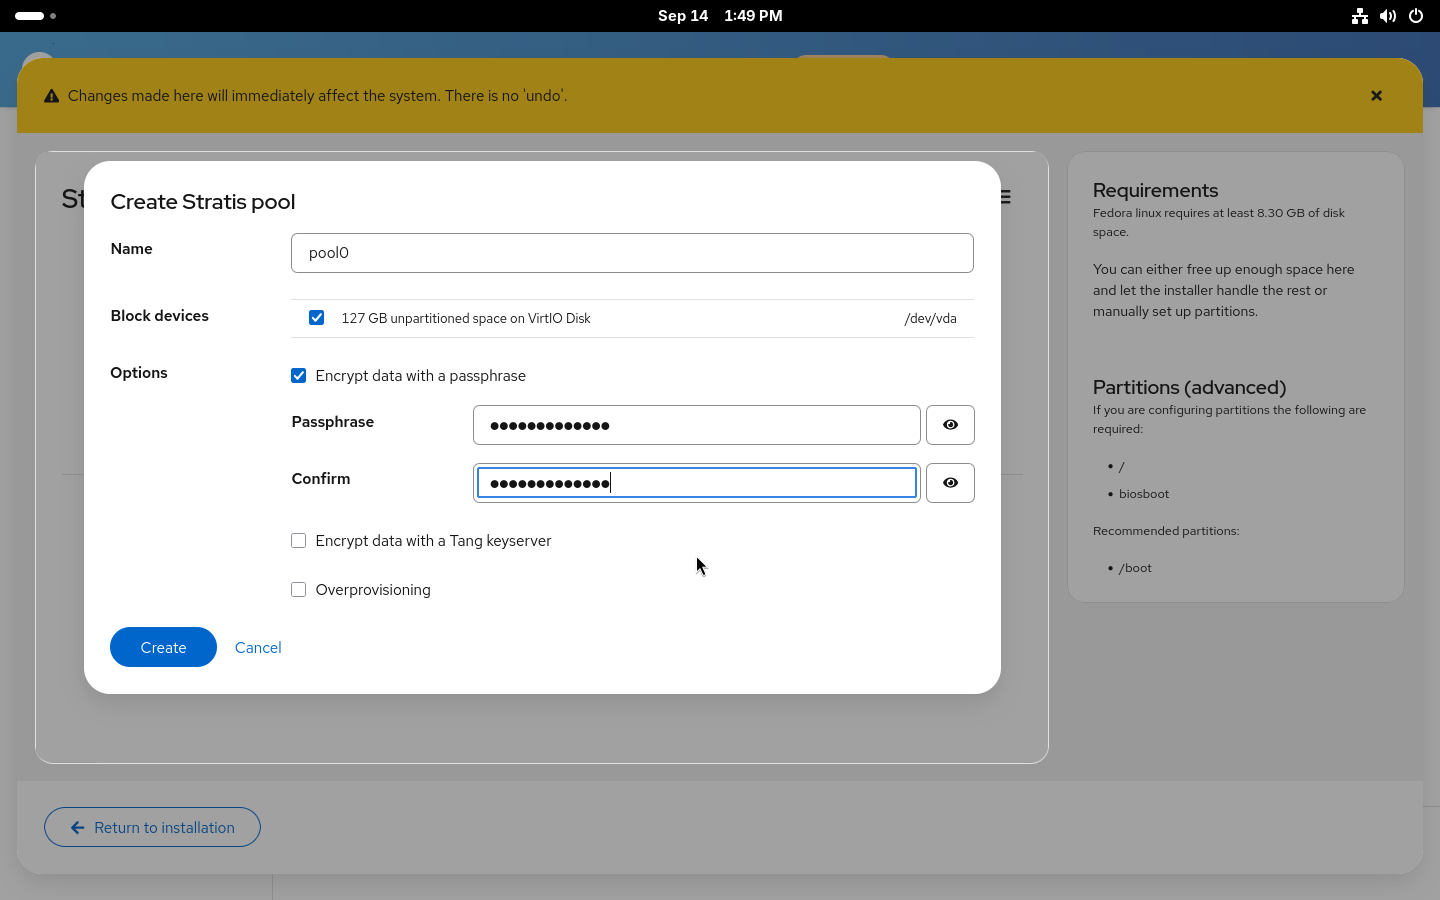
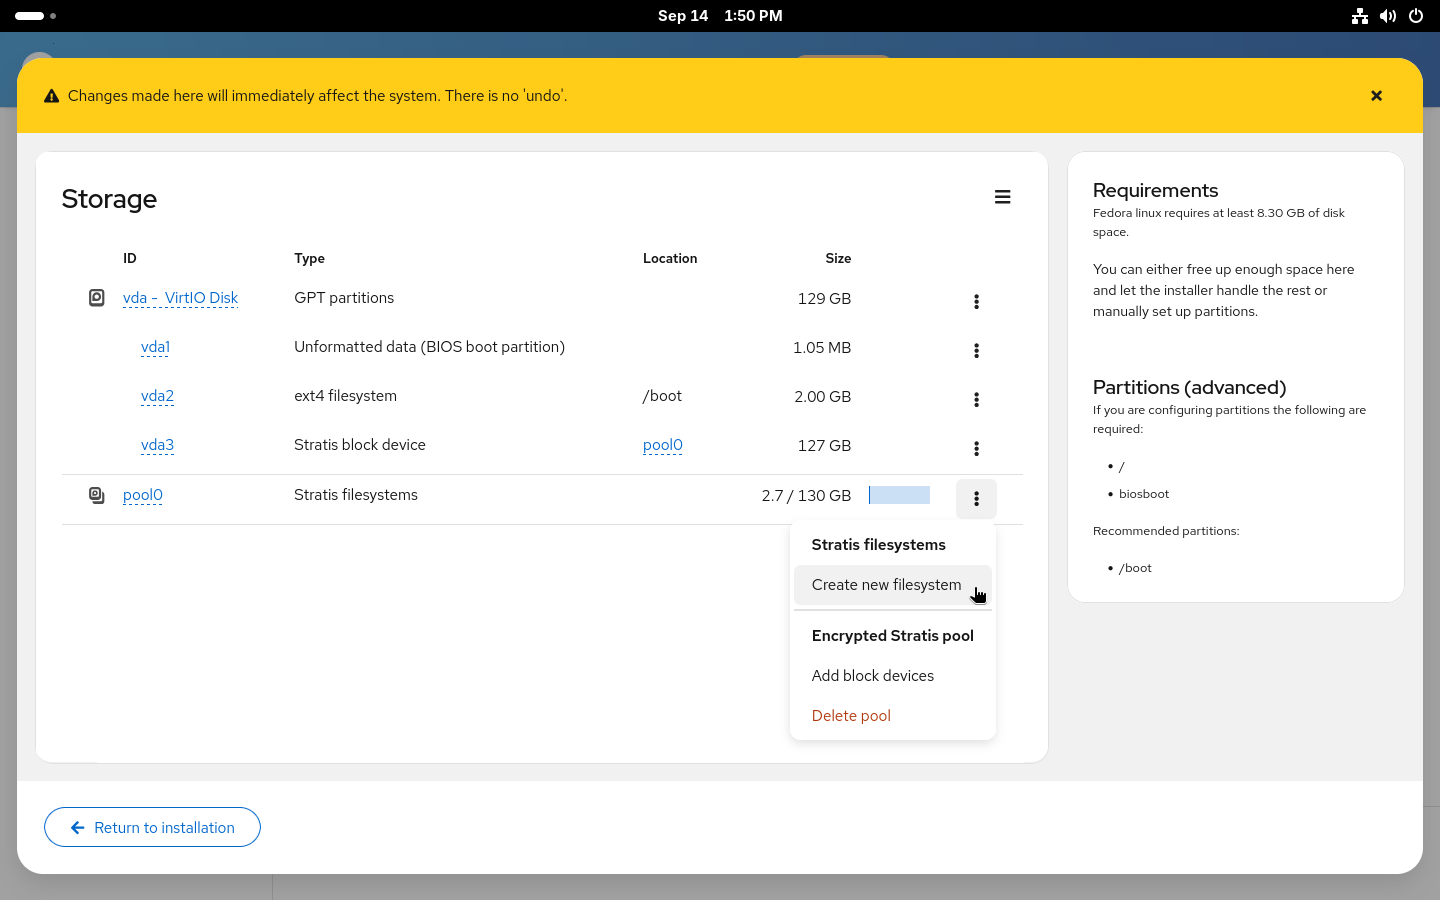
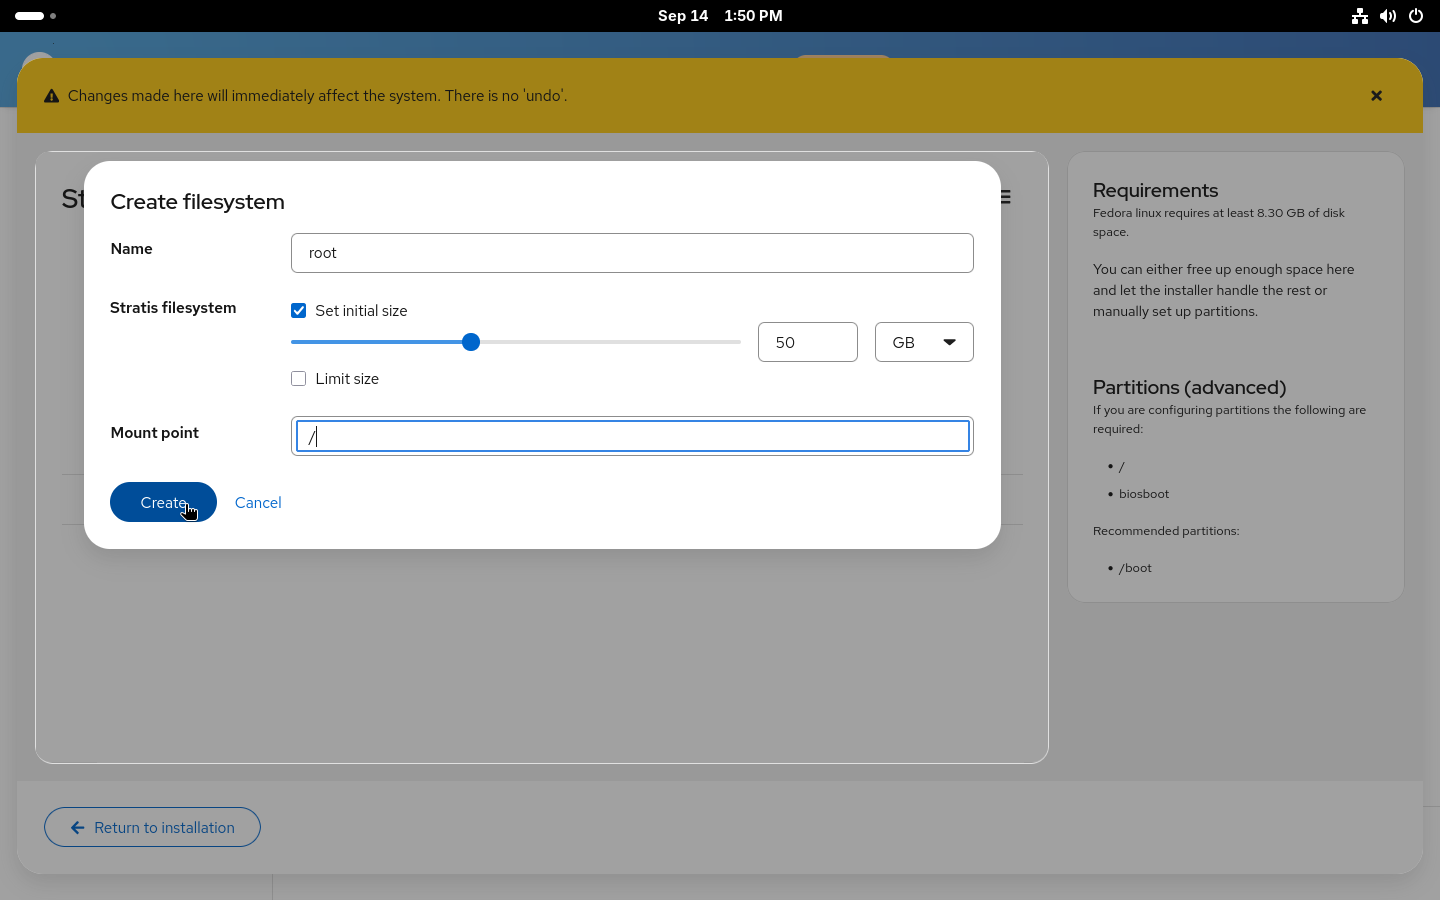
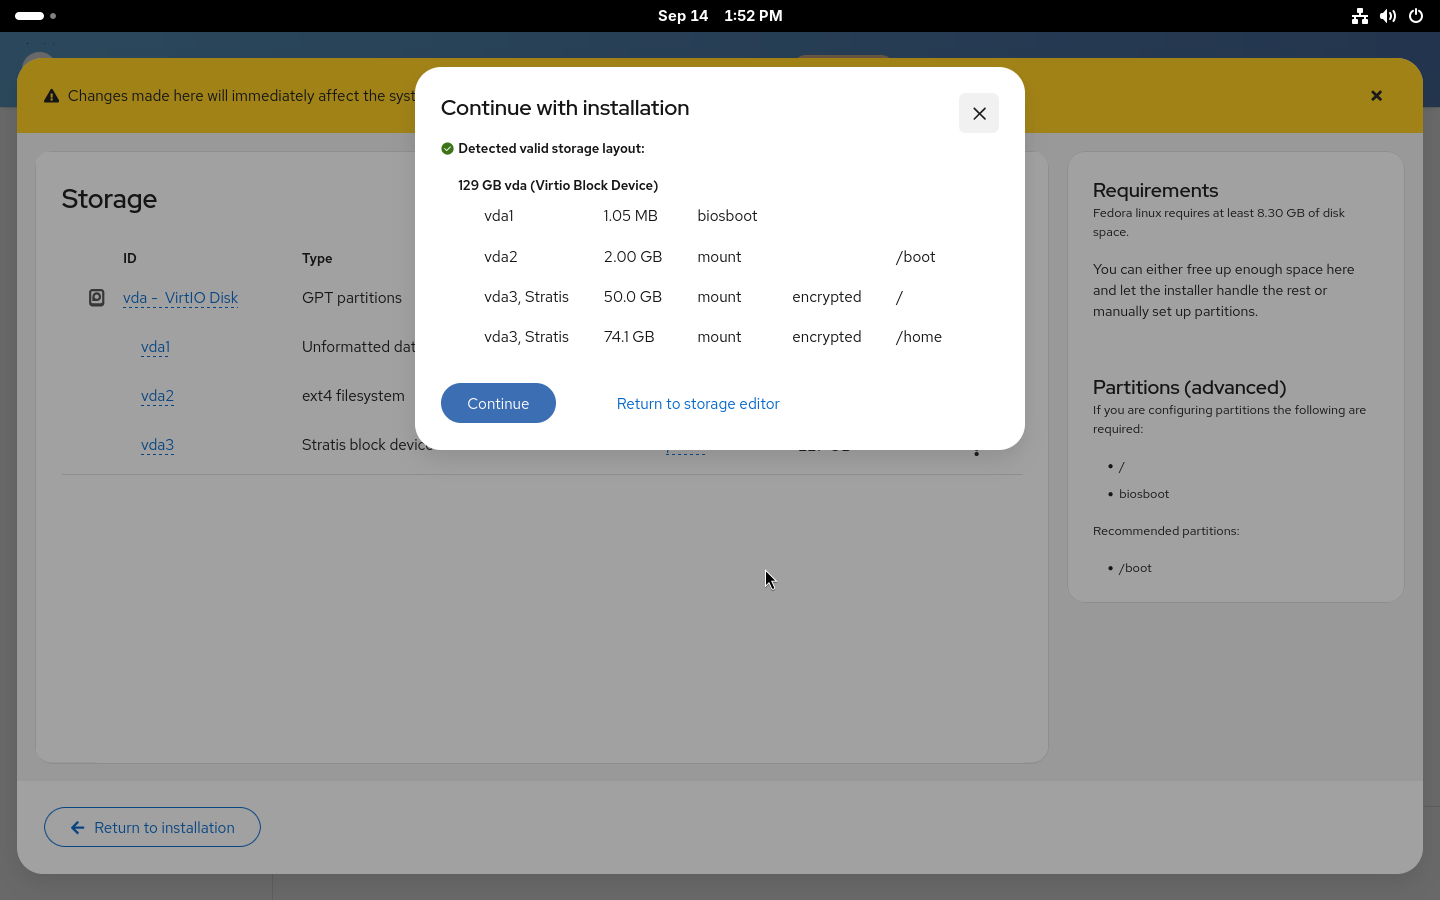
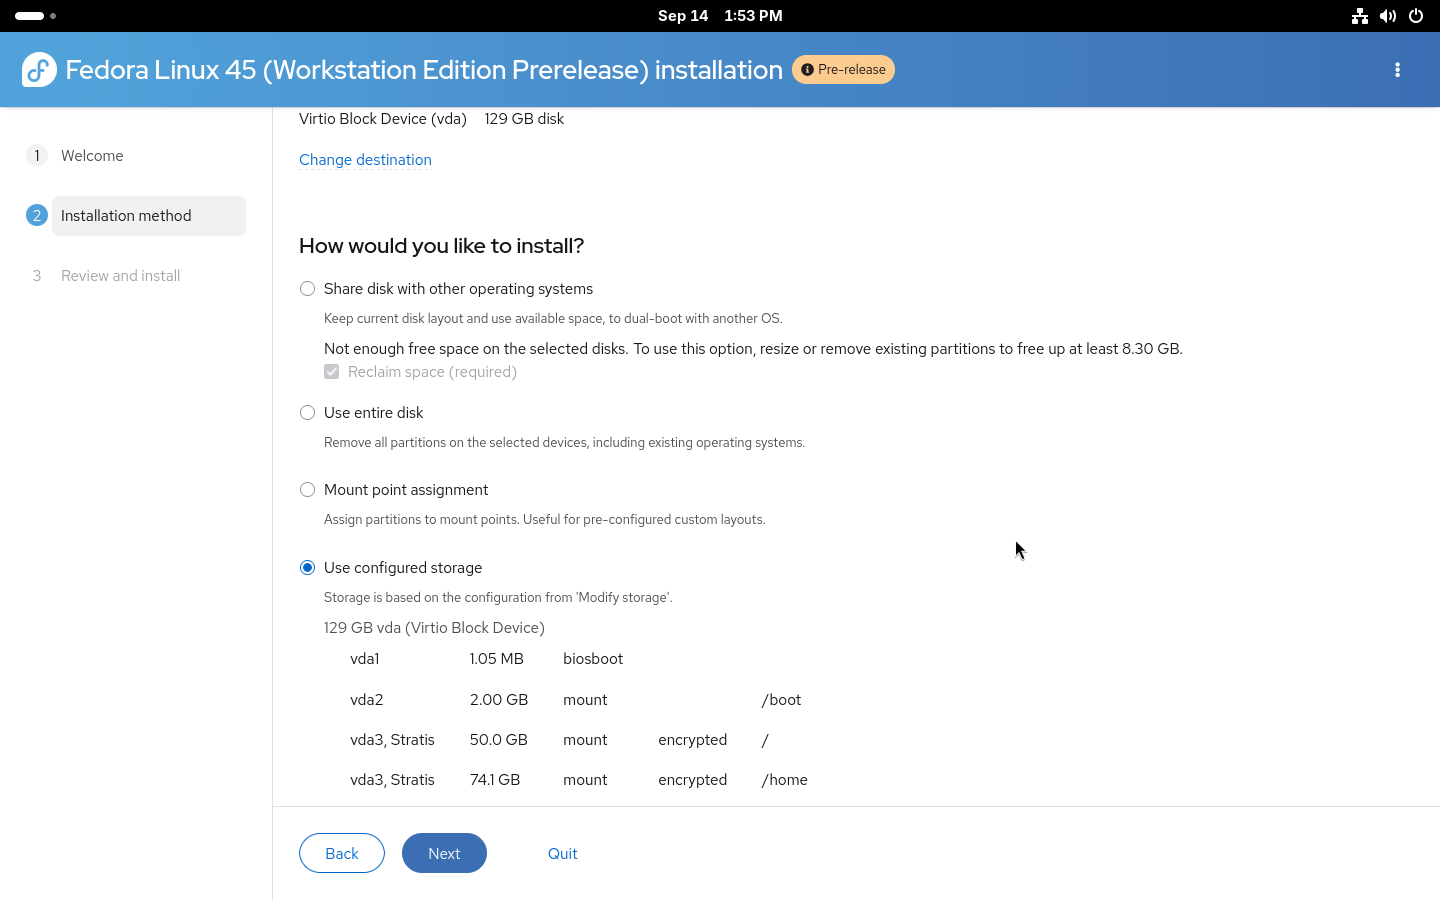
Boot the verified live installer in UEFI mode. Choose the intended disposable installation disk, review the proposed storage changes, and enable “Encrypt my data.” Set and securely record a strong disk passphrase. Confirm the keyboard layout used at boot. Review the installation summary carefully before approving the destructive installation.
Figure 1
The installer encryption choice

Note. The empty passphrase fields show the setup stage, not a suggested password length.
Finish installation, restart into the installed system, and confirm that the disk passphrase unlocks it. Complete initial setup, create the local account and account password, and verify that you can log in. The lab account was joemurphy; use your own account. Third-party repositories were not needed for the FIDO2 procedure.
Step 2 Update and identify the encrypted volume
sudo dnf upgrade --refresh
sudo reboot
After the update completed and the installed system restarted, I checked the release, running kernel, and storage layout:
cat /etc/fedora-release
uname -r
lsblk -o NAME,SIZE,FSTYPE,MOUNTPOINTS
| Lab device | Size | Purpose |
| /dev/sda1 | 600 MB | vfat mounted at /boot/efi |
| /dev/sda2 | 2 GB | ext4 mounted at /boot |
| /dev/sda3 | 1.8 TB reported | crypto_LUKS backing the Btrfs root and home mounts |
Device gate. Every /dev/sda3 command below refers to this lab’s encrypted partition. Your device may be /dev/nvme0n1p3 or something else. Establish the partition backing your installed root and home filesystems, then substitute that verified device everywhere. Do not use a whole disk, an already unlocked /dev/mapper path, or a partition chosen only because its number matches mine.
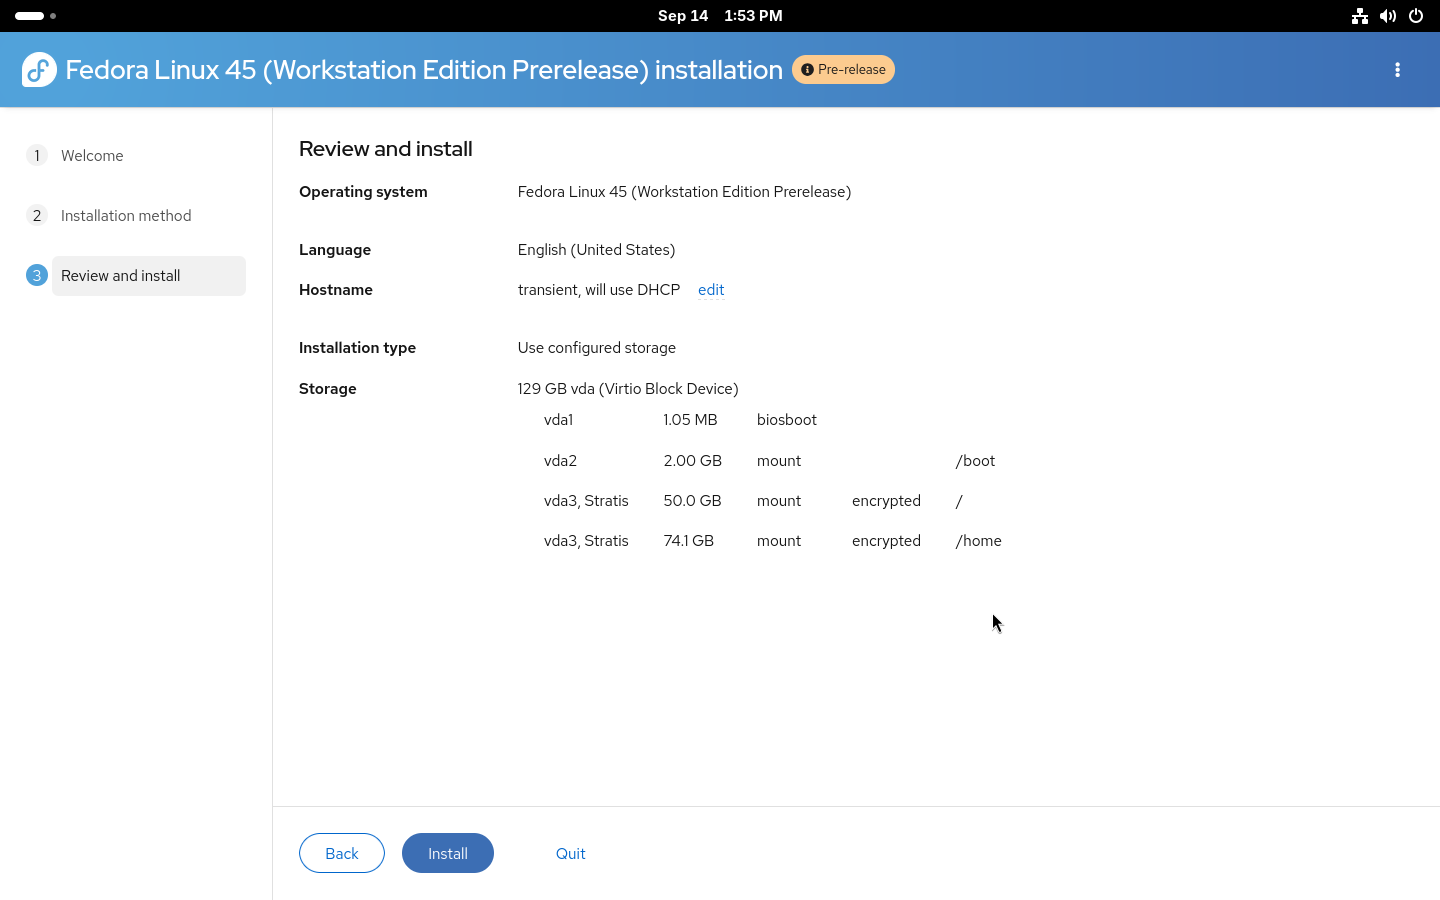
Figure 2
Fedora Linux 45 installation summary showing the EFI partition, /boot partition, and encrypted Btrfs root and home volumes.

sudo cryptsetup luksDump /dev/sda3 | head -n 12
Success check: the header reports LUKS version 2 for the intended encrypted partition. The inspection command above displays only the beginning of the header.
Before changing authentication
Confirm the disk passphrase and account password work and are available independently of the computer. Keep a second key available as you add it later. The lab recorded a local header backup in the next step, but no completed off-device backup was documented. A backup kept only on the encrypted root filesystem cannot be reached if that filesystem cannot be unlocked. Arrange protected off-device recovery copies before relying on this design.
Step 3 Prepare the first key and preserve the header
Connect only the key being enrolled. This avoids ambiguity when a command automatically selects a FIDO2 device. The first key already had a PIN; the second Yubico key’s PIN was set and tested in Windows before its Linux enrollment. A key with no PIN must have one configured using its supported management tool before the PIN-required steps below.
sudo systemd-cryptenroll --fido2-device=list
sudo dnf install yubikey-manager
ykman info
ykman fido info
ykman fido access verify-pin
Success check: device information identifies the intended Yubico key and the existing PIN verifies. These ykman commands are for the Yubico devices. They are not a management procedure for the uTrust keys. Do not reset an authenticator to troubleshoot an ordinary prompt; a reset would require a separate credential-recovery plan.
The tools’ existing support was sufficient; this lab did not need to compile pam-u2f or add custom udev rules. Do not import those changes from a different version of Fedora Linux.
sudo cryptsetup luksHeaderBackup /dev/sda3 --header-backup-file /root/luks-backup.img
sudo ls -lh /root/luks-backup.img
sudo cp -a /etc/crypttab /root/crypttab.before-fido2
Figure 3
FIDO2 security-key detection, YubiKey identification, and successful PIN verification on Fedora Linux 45.
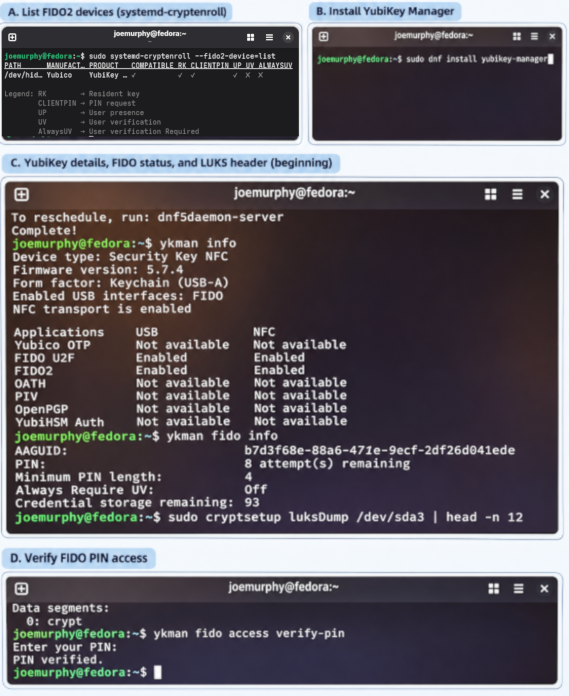
Note. The screen shots above show the commands and observed results from the Fedora Linux 45 lab. Device information, firmware version, and available FIDO2 capabilities may differ between security keys. The final panel confirms successful PIN verification. Use the complete commands provided in the guide rather than copying them from the photographs.
Success check: the header-backup command completes, and the recorded file was 16 MB and accessible only to root. Preserve it securely. This was the pre-enrollment backup, not evidence of a later backup containing every enrollment. The crypttab copy preserves the original boot-unlock configuration.
Do not overwrite an existing backup from an earlier attempt without first deciding which state you need to retain. Header restoration and slot deletion were not exercised in this session, so neither is presented as a tested recovery procedure here.
Step 4 Enroll the first key for disk unlocking
With the intended key still the only FIDO2 authenticator connected, run the enrollment command against your verified LUKS2 partition:
sudo systemd-cryptenroll /dev/sda3 --fido2-device=auto --fido2-with-client-pin=yes --fido2-with-user-presence=yes
The prompt for the current disk passphrase authorizes adding the enrollment. The later security-token PIN prompt asks for the key’s PIN. They are different secrets. Follow the touch prompts when the key requests confirmation.
Success check: the command reports a new FIDO2 token and a key-slot number. The first Yubico key received slot 1 in this lab. Your number can differ; record what the tool actually reports. LUKS2 enrollment requires a FIDO2 device supporting the hmac-secret extension (systemd project, n.d.).
Figure 4
LUKS2 header backup and successful FIDO2 security-key enrollment using systemd-cryptenroll, showing the authentication prompts and confirmation of enrollment in key slot 1.
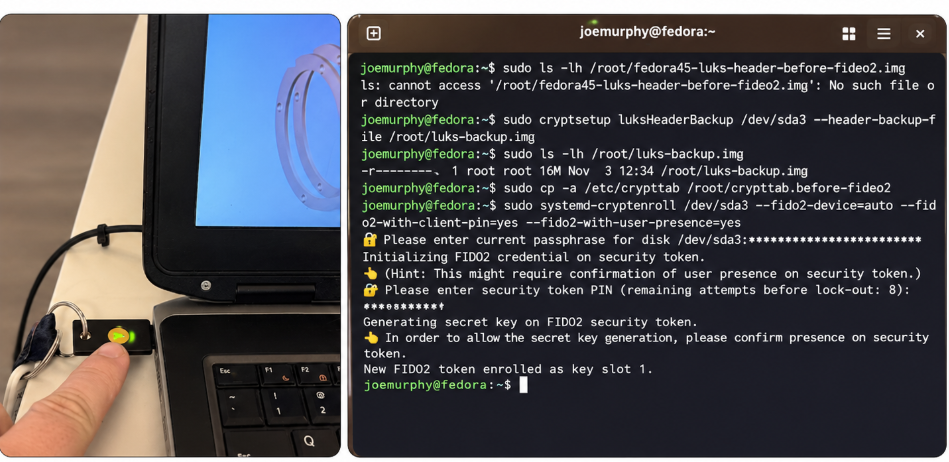
Note. This is a historical result, not a slot number to enter manually.
Add FIDO2 discovery to the existing crypttab entry
First inspect your existing entry. In this lab, its option field was exactly discard,x-initrd.attach. The successful edit appended fido2-device=auto to that field:
sudo cat /etc/crypttab
sudo sed -i 's/discard,x-initrd.attach/discard,x-initrd.attach,fido2-device=auto/' /etc/crypttab
sudo cat /etc/crypttab
Figure 5
Configuring FIDO2 discovery in /etc/crypttab and preparing Dracut to include FIDO2 support in the initramfs.
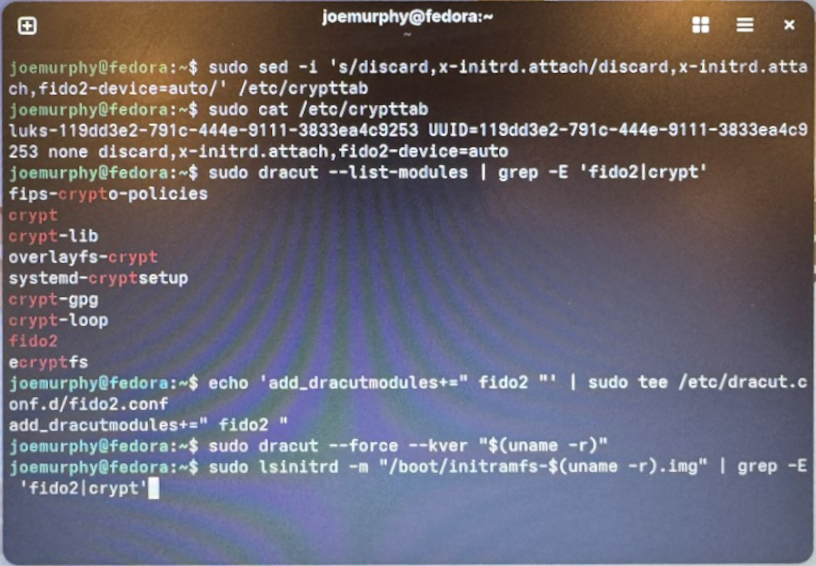
Run that substitution only after confirming the matching option field belongs to your intended encrypted volume and does not already contain the new option. It is the lab’s exact edit, not a general editor for arbitrary crypttab layouts. If your configuration differs, stop and adapt it deliberately; do not replace unrelated entries.
The verified entry retained four fields: its existing mapping name, its UUID source, none, and the comma-separated options. The resulting options were discard,x-initrd.attach,fido2-device=auto. Keep your existing mapping name and UUID.
Step 5 Include FIDO2 in the boot image
I verified that the dracut FIDO2 module was available, added it to the configuration, rebuilt the running kernel’s initramfs, and checked the resulting image. Preserve the spaces inside the quoted module list (Dracut project, n.d.).
sudo dracut --list-modules | grep -E 'fido2|crypt'
echo 'add_dracutmodules+=" fido2 "' | sudo tee /etc/dracut.conf.d/fido2.conf
sudo dracut --force --kver "$(uname -r)"
sudo lsinitrd -m "/boot/initramfs-$(uname -r).img" | grep -E 'fido2|crypt'
Success check: the module listing includes fido2, the rebuild completes, and inspection of the built image includes fido2 and the encryption-related modules. Do not reboot past an unexplained rebuild failure. This command rebuilt the currently running kernel’s image; testing every installed or future kernel was outside this session.
Figure 6
Dracut configuration, initramfs rebuild, and verification that the FIDO2 module is included in the boot image.

Note. Read the commands in the text rather than copying from a perspective photograph.
Save your work and reboot with the key inserted before power-on. At the disk-unlock screen, enter the key’s PIN and touch it when requested. Success means the system progresses to the graphical account-login screen. At this point the account still uses its existing password; PAM enrollment comes next.
Step 6 Register the key for the local account
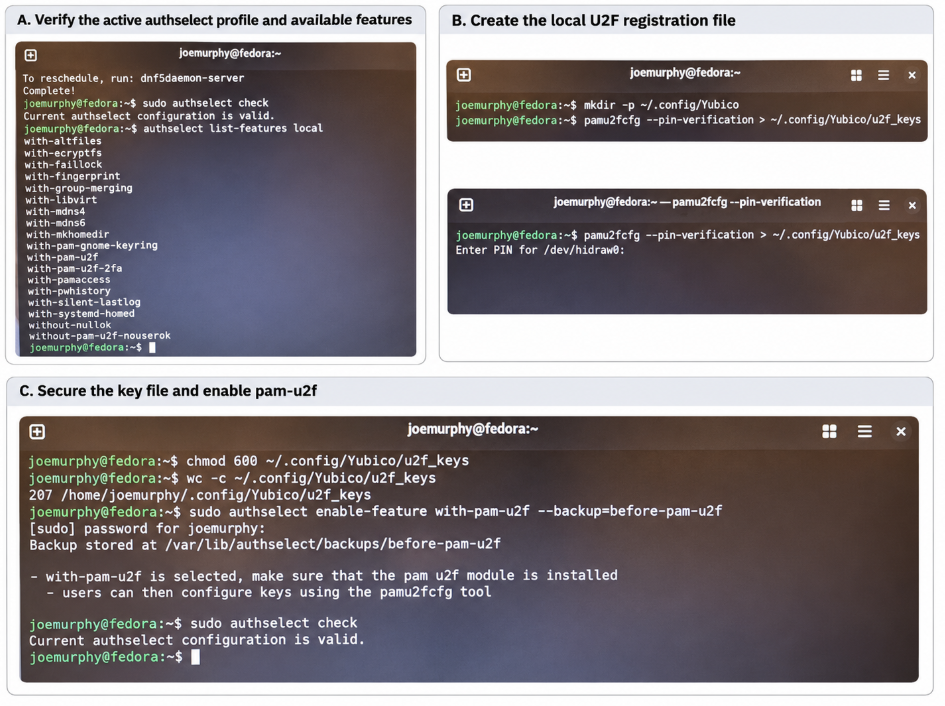
Disk enrollment has not registered the key for login or sudo. While logged into your own account, inspect the active authentication profile and install the packaged PAM tools:
sudo authselect current
sudo dnf install pam-u2f pamu2fcfg
sudo authselect check
authselect list-features local
The lab profile was local, with with-silent-lastlog, with-mdns4, and with-fingerprint already enabled. The configuration check reported valid, and the available feature list included with-pam-u2f. If your profile or validity result differs, resolve that difference before continuing. Do not force-select a new profile over an unfamiliar configuration.
Register as your normal account, without sudo. The first registration writes the initial mapping file; do this only when you are creating that file for the first key. If you already have registrations, use Step 8 to preserve them.
mkdir -p ~/.config/Yubico
pamu2fcfg --pin-verification > ~/.config/Yubico/u2f_keys
chmod 600 ~/.config/Yubico/u2f_keys
wc -c ~/.config/Yubico/u2f_keys
Enter the token PIN and complete the requested touch. The first Yubico registration produced 207 bytes. That count is a lab observation, not a universal validity requirement; the uTrust records were longer. Registration must complete successfully with the intended key.
The registration option requests PIN verification during authentication; user presence was not disabled (Yubico, n.d.-b). This is policy for these registrations. It does not change every website or application to require the PIN, and insertion alone does not trigger authentication.
sudo authselect enable-feature with-pam-u2f --backup=before-pam-u2f
sudo authselect check
Success check: the named authselect backup is reported and the configuration remains valid. Authselect manages the shared PAM files; enabling a supported feature avoids hand-editing those generated files (Authselect project, n.d.). The password fallback remained enabled. This was not the with-pam-u2f-2fa feature that would require the account password as well.
Figure 7
Fedora Linux 45 PAM U2F configuration: verifying the authselect profile, registering the security key, enabling PAM U2F authentication, and validating the final configuration.
Step 7 Verify each authentication path
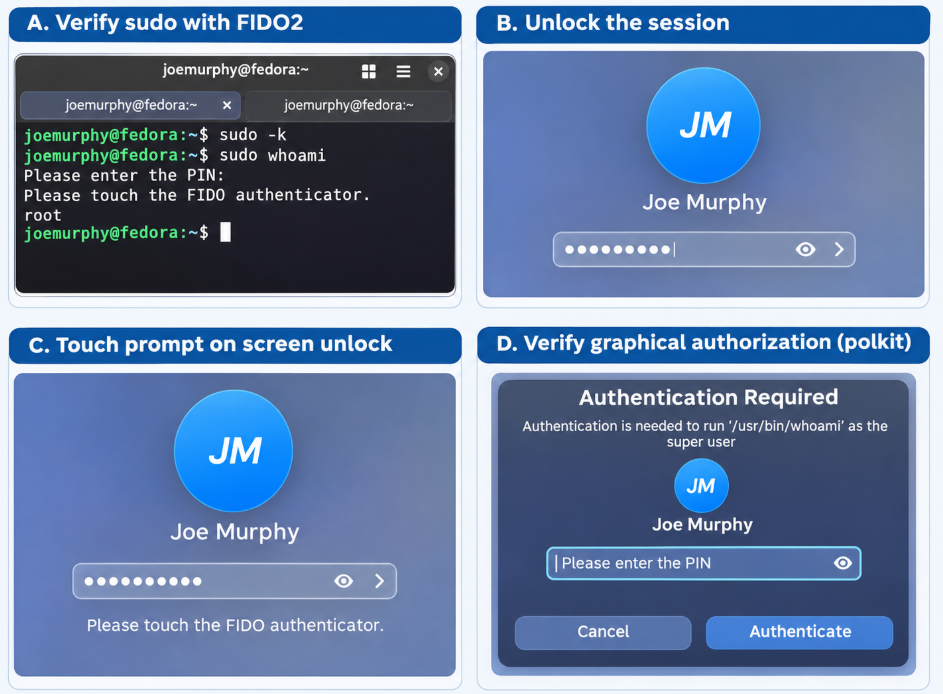
sudo -k
sudo whoami
Success check: a fresh sudo authentication asks for the PIN and then a touch, and whoami returns root. sudo -k invalidates the current cached sudo authentication. Without it, a successful command may simply reuse a timestamp. Keep your existing logged-in session open while testing.
Run this as your normal user in a terminal within the local GNOME desktop session, without sudo:
pkexec /usr/bin/whoami
Success check: the graphical authorization dialog accepts the key’s PIN and touch, and the command returns root. This confirms the polkit path used by that test. It is not a claim that every desktop application uses the same authorization policy.
Press Super+L to lock the desktop. Wake it, authenticate with PIN and touch, and confirm your existing session unlocks. Next save your work and use the top-right system menu’s Log Out action. At the full GDM sign-in screen, select your account and repeat the key authentication. A lock-screen test does not replace a full logout-and-login test.
No separate polkit key enrollment was necessary. During investigation, the vendor GDM files under /usr/lib/pam.d led to password-auth, while sudo and polkit used system-auth. The same account mapping was used through those paths. No manual GDM or polkit PAM edits were part of the successful procedure.
Figure 8
Verification of FIDO2 authentication on Fedora Linux 45, demonstrating successful sudo authentication, graphical session unlocking, security-key touch confirmation, and polkit authorization.
Step 8 Add a second key without replacing the first
Repeat this stage with only the new key connected. The following is the exact successful second-Yubico workflow. That key already had a verified PIN set in Windows. Generate its account registration into a temporary file:
pamu2fcfg --pin-verification > ~/yubico-new-registration
wc -c ~/yubico-new-registration
cp -p ~/.config/Yubico/u2f_keys ~/.config/Yubico/u2f_keys.before-new-yubico
Success check: registration completes; the recorded Yubico output was 207 bytes. The backup command must complete before the next step. Be careful with the dot in ~/.config. An early failed copy in the lab used ~/config and was corrected before proceeding.
Append the new credential to the existing account’s line, preserving its earlier credentials. This script checks that the usernames match, then joins the new credential to the existing mapping:
python3 - <<'PYMERGE'
from pathlib import Path

mapping = Path.home() / ".config/Yubico/u2f_keys"
registration = Path.home() / "yubico-new-registration"

existing = mapping.read_text().strip()
new = registration.read_text().strip()

assert existing.split(":", 1)[0] == new.split(":", 1)[0], "Username mismatch"

mapping.write_text(existing + ":" + new.split(":", 1)[1] + "\n")
PYMERGE
Run the merge once for this newly generated registration. It is not a duplicate-removal utility or a validator for arbitrary malformed or multi-user files. It was used on the lab’s single-account, single-line mapping. Do not repeatedly append the same file.
sudo -k
sudo whoami
Success check: with only the new key connected, sudo requires its PIN and touch and returns root. Then test pkexec, lock-screen unlock, and full logout/login as in Step 7. The default mapping format permits several colon-separated credentials for one username (Yubico, n.d.-a). No second authselect feature change is needed.
Step 9 Enroll the additional key for the disk
The second key’s successful sudo test does not authorize it for LUKS. Keep only that key connected and repeat the same disk-enrollment command, using the verified encrypted partition:
sudo systemd-cryptenroll /dev/sda3 --fido2-device=auto --fido2-with-client-pin=yes --fido2-with-user-presence=yes
Enter the existing disk passphrase, then this key’s PIN, and confirm presence when requested. Success check: a new FIDO2 enrollment is reported. The second Yubico key received slot 4 because two uTrust keys had already been added between the Yubico enrollments. A new two-key installation can allocate different slot numbers.
| Lab slot | Enrollment retained | Result in this session |
| 0 | Original disk-passphrase fallback | Successfully unlocked without a key |
| 1 | First Yubico Security Key NFC | Repeated disk-unlock tests passed |
| 2 | First Identiv uTrust | Enrolled; later intermittent unlock failures |
| 3 | Second Identiv uTrust demo key | Enrolled; later intermittent unlock failures |
| 4 | Second Yubico Security Key NFC | Repeated disk-unlock tests passed |
The slot labels above record enrollment order and observed results. They are not commands, universally assigned numbers, or a suggestion to delete a slot. Every enrollment was left in place, including the two uTrust enrollments.
The lab did not repeat the crypttab or dracut changes for each added key. It repeated enrollment and validation. The account mapping and LUKS header are separate records, so keep track of both when managing several physical keys.
What the demo PIN means
No PIN value is needed for this guide. Choose your own, and keep the primary and backup keys under your control. The demonstration key’s PIN was not published here. Changing a PIN and resetting an authenticator are different operations; this session did not test a reset or a post-demo removal-and-reenrollment sequence.
Step 10 Test the complete sequence
For each test, connect only the key you intend to evaluate. Insert it into the selected USB port before turning the machine on. Cold-boot disk unlocking, full account login, and screen unlocking exercise different stages. Save work before any restart or logout.
| Test | Observed Yubico result |
| First key through four physical USB ports | Disk unlocking succeeded in all four reported port tests |
| Second key through four physical USB ports | Disk unlocking and login succeeded in all four reported port tests |
| One key for the disk and the other for the desktop | Succeeded; additional swaps and port changes also reported successful |
| Screen lock followed by key rotation | Each enrolled key unlocked the screen in reported tests |
| Fresh sudo authentication | PIN plus touch; root returned |
| Graphical polkit test | PIN plus touch; root returned |
| After transition to Yubico-only testing | No further failures reported by the author |
The four port names used in my notes were top right, top left, middle right, and bottom right as viewed while using the laptop. These describe this test unit, not USB controller types. I did not record a formal attempt total or a measured failure rate, so no percentage or reliability score is claimed.
A reproducible test record should identify the physical key, port, whether it was present before power-on, which stage was tested, and the exact result. If an attempt fails, avoid changing several variables at once. In this session, early successes did not predict the later uTrust failures.
Late insertion was less dependable
Inserting a key after the boot-unlock screen had appeared worked sometimes but not consistently. Having the selected key connected before power-on was the more dependable workflow observed. This does not establish the reason for the difference or guarantee hot-plug behavior across keys and systems.
Success with PIN and touch at login does not remove the account password or change privilege membership. Existing sudo and polkit authorization decisions still determine which actions the account may perform.
Recovery and the problems encountered
The tested recovery path
I rebooted with the key unplugged. The boot screen initially continued asking for a LUKS2 token PIN. Pressing Enter with an empty field did not immediately switch to a disk passphrase. Escape changed between graphical and text views; it did not cancel token authentication.
In the successful recovery attempt, I entered the usual token PIN with the token absent and waited. The prompt eventually changed to the disk-passphrase prompt. I entered the strong disk passphrase, the disk unlocked, and I logged in using the account-password fallback. The delay was not measured. This sequence documents what happened; it does not establish a universal timeout or a recovery procedure for a forgotten token PIN.
Figure 9
The initial boot prompt still asked for a token PIN

Note. The later disk-passphrase prompt was a different stage.
Recovery secrets must remain available outside the encrypted computer. Do not discard them because the keys are working. The fallback intentionally provides another way in; its strength and storage matter to the overall design.
The uTrust result changed with further testing
Both uTrust keys completed PAM registration and LUKS enrollment. Initial sudo, polkit, login, and screen-unlock tests succeeded. The first uTrust GDM failure led us to inspect shared PAM configuration and logs. A later correctly controlled attempt worked without a demonstrated configuration repair.
Repeated boot testing then exposed intermittent disk-unlock failures with both uTrust devices, including attempts with a key connected before startup. The Yubico key unlocked the same machine during this troubleshooting. Some earlier attempts might have involved the wrong PIN, so those attempts alone are inconclusive; the later repeated failures are why I would not rely on these uTrust devices for boot unlocking on this test unit.
Periodic green flashing and a brief red indication were observed on uTrust devices. Their meaning and any causal connection were not established. The log search reported no matching SELinux AVCs in the inspected results. Neither observation identifies a firmware, USB, PAM, or Fedora Linux defect.
Security boundaries and operating practice
This design reduces routine use of a reusable account password and gives a practical hardware-backed route into an encrypted personal computer. It still has a PIN and retained fallback passwords. Calling it a passwordless daily workflow describes the tested user experience; it does not mean passwords or password hashes have been eliminated.
The hardware path requires the registered key and its PIN, but password fallback remains an alternative. A stolen fallback account password can therefore still permit account access; a stolen disk passphrase can still unlock the volume. Touch confirms presence for the requested operation; it is not proof that the request is trustworthy. Malware, a compromised privileged account, or a tampered boot environment can defeat assumptions outside this lab. No adversarial testing was performed.
Local disk unlocking and PAM are not a test of browser WebAuthn phishing resistance. This guide makes no promise that these local paths prevent all phishing, session theft, keylogging, or malicious authorization prompts. Encryption protects stored data when locked; it does not shield an already unlocked system from every threat.
The PAM registration file was stored in the user’s home directory, so it was available after the system volume unlocked. That arrangement is not a hardened defense against an attacker already able to modify that account’s files. Individually encrypted or network-mounted homes were not tested. The registration also used the default hostname-based relying-party identity; renaming or moving the configuration was not tested.
Keep system updates, independent backups, physical protection, and least privilege in the design. A successful root test demonstrates authorized escalation; it is not an instruction to operate as root routinely. Key removal did not configure automatic screen locking or revoke a cached sudo timestamp.
The approach fits a defense-in-depth strategy. It can support a broader zero trust design, but adding a token does not itself create one. Zero trust separates authentication and authorization and avoids treating location or ownership as sufficient trust (Rose et al., 2020). Apply those principles to the rest of the environment as well.
What I would require before depending on it
My next operational requirements are protected off-device recovery material, continued testing after updates, and a deliberate plan for lost-key revocation. Those are recommendations, not completed tests in this report. Slot removal, header restoration, key resets, and forgotten-PIN recovery were not exercised. All existing enrollments remain intact.
Optional: FIDO2-backed SSH from Linux
A guide for configuring Linux clients to use YubiKeys for SSH authentication can be found here: https://docs.fedoraproject.org/en-US/quick-docs/using-yubikeys/#_using_the_yubikey_to_authenticate_against_openssh_servers
Optional: FIDO2-backed SSH from Windows
On November 17, 2026, following editorial suggestions from Gregory, I updated my Fedora workstation and extended the original Fedora Linux 45 lab to test remote SSH authentication from a Windows computer at home. OpenSSH accepted the Yubico FIDO2 key with PIN and touch, and a fresh reconnection also succeeded.
After updating, the Fedora workstation ran kernel 7.3.4-300.fc45.x86_64, openssh-clients and openssh-server 10.5p1-1.fc45, and libfido2 1.17.0-6.fc45. The Windows computer used OpenSSH_for_Windows_9.5p2 with LibreSSL 3.8.2.
Examples use 192.168.x.x for the Fedora address and <FEDORA_USER> for its account. Replace these placeholders before running commands. Run Windows commands one at a time in a regular PowerShell window. Run Fedora commands as the normal user, using sudo only where shown.
1 Prepare the Fedora workstation
sudo dnf --refresh upgrade -y
sudo dnf install -y openssh-clients openssh-server libfido2
sudo authselect check
sudo reboot
After reboot, I recorded the versions above. SSH was initially inactive and disabled. I generated missing host keys, checked the configuration, and started the service for the session:
sudo ssh-keygen -A && sudo /usr/sbin/sshd -t && sudo systemctl start sshd
ip -br -4 address show scope global
sudo firewall-cmd --get-active-zones
sudo firewall-cmd --list-all
sudo ssh-keygen -lf /etc/ssh/ssh_host_ed25519_key.pub
The active FedoraWorkstation firewall zone already allowed SSH; I added no firewall rule or router port forwarding. Starting sshd did not enable it at boot. I recorded the ED25519 host fingerprint for comparison from Windows.
2 Create the SSH credential on Windows
I connected one Yubico key to Windows and confirmed that ssh -V reported 9.5p2 and ssh -Q key listed the sk- key types. Then I ran:
New-Item -ItemType Directory -Force "$env:USERPROFILE\.ssh" | Out-Null
ssh-keygen -t ed25519-sk -O verify-required -C "fedora45-ssh-lab-key1" -f "$env:USERPROFILE\.ssh\id_ed25519_sk_fedora45_lab_key1"
I entered the existing security-key PIN, touched the key, and left the separate local file passphrase empty. This created a non-resident SSH credential with a local handle file and a .pub public-key file. The local handle file is needed with this key; the key was not reset.
3 Copy and authorize the public key
From Windows, I copied only the public key using the Fedora account password for this initial transfer. I accepted the host only after its ED25519 fingerprint matched the value recorded locally on Fedora Linux:
scp -o HostKeyAlgorithms=ssh-ed25519 -o PreferredAuthentications=password -o PubkeyAuthentication=no "$env:USERPROFILE\.ssh\id_ed25519_sk_fedora45_lab_key1.pub" <FEDORA_USER>@192.168.x.x:fedora45-ssh-lab-key1.pub
On Fedora Linux, as the normal user, I checked the transferred public key’s fingerprint against the Windows result:
ssh-keygen -lf "$HOME/fedora45-ssh-lab-key1.pub"
I verified that the transferred public key’s fingerprint matched the Windows result. The following registration commands back up any existing authorized_keys file and add the key with verify-required:
(
set -e
lab_pub="$HOME/fedora45-ssh-lab-key1.pub"
umask 077
mkdir -p "$HOME/.ssh"
chmod 700 "$HOME/.ssh"
if [ -f "$HOME/.ssh/authorized_keys" ]; then
    cp -p "$HOME/.ssh/authorized_keys" \
        "$HOME/.ssh/authorized_keys.before-fido2-$(date +%Y%m%d-%H%M%S)"
fi
touch "$HOME/.ssh/authorized_keys"
lab_entry="verify-required $(tr -d '\r\n' < "$lab_pub")"
if ! grep -qxF "$lab_entry" "$HOME/.ssh/authorized_keys"; then
    printf '\n%s\n' "$lab_entry" >> "$HOME/.ssh/authorized_keys"
fi
chmod 600 "$HOME/.ssh/authorized_keys"
restorecon -Rv "$HOME/.ssh"
ssh-keygen -lf "$HOME/.ssh/authorized_keys"
)
The fingerprint matched. The verify-required entry requires user verification for this SSH key; default touch requirements remain in place. No SSH restart or PAM configuration change was needed.
4 Test from Windows
With the key connected to Windows, I ran this single command. It selects the lab credential, disables agent use and connection sharing, and permits only public-key authentication for this connection:
ssh -o IdentitiesOnly=yes -o IdentityAgent=none -o PreferredAuthentications=publickey -o PasswordAuthentication=no -o KbdInteractiveAuthentication=no -o ControlPath=none -i "$env:USERPROFILE\.ssh\id_ed25519_sk_fedora45_lab_key1" <FEDORA_USER>@192.168.x.x
Windows requested the security-key PIN and touch. SSH reported “User presence confirmed” and opened the Fedora Linux shell.
Observed results
whoami
hostname
printenv SSH_CONNECTION
whoami returned my Fedora account, hostname returned fedora, and SSH_CONNECTION showed the Windows client connecting to the Fedora workstation on port 22. I exited and connected again successfully with PIN and touch. No Fedora account password was used for these public-key login tests.

Figure 10. Windows requested the external security key PIN during SSH login. The PIN field is redacted.
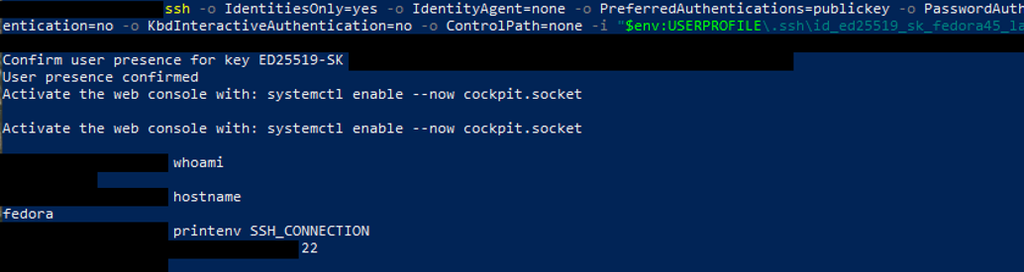
Figure 11. Successful SSH authentication and remote identity checks. Network addresses, account identifiers, the key fingerprint, and the connection’s temporary port are redacted. Remaining command text is unchanged.
Scope: these results cover one enrolled SSH key and successful local-network logins. Server password authentication remained available; password fallback was disabled only in the test command. The workstation was already running with its encrypted disk unlocked.
Community acknowledgment
I am grateful to the Fedora community and the contributors to systemd, cryptsetup, dracut, authselect, PAM, libfido2, and the hardware tooling. Being able to combine their work into a useful home lab is the reason this project was possible. I hope the results help others test carefully and share what they learn.
References
Authselect project. (n.d.). authselect(8). Retrieved November 4, 2026, from https://github.com/authselect/authselect/blob/master/src/man/authselect.8.adoc
Dracut project. (n.d.). dracut.conf(5). Retrieved November 4, 2026, from https://dracut-ng.github.io/dracut/man/dracut.conf.5.html
Murphy, J. (2025, September 19). Integrating a uTrust FIDO2 security key for full disk encryption, login, and sudo access on Fedora 42. Fedora Magazine. https://fedoramagazine.org/integrating-utrust-fido2-security-key-for-disk-encryption-login-and-sudo-access-for-fedora-42/
OpenSSH project. (n.d.-a). sshd(8). Retrieved November 17, 2026, from https://man.openbsd.org/sshd
OpenSSH project. (n.d.-b). ssh-keygen(1). Retrieved November 17, 2026, from https://man.openbsd.org/ssh-keygen
Rose, S., Borchert, O., Mitchell, S., & Connelly, S. (2020). Zero trust architecture (NIST Special Publication 800-207). National Institute of Standards and Technology. https://doi.org/10.6028/NIST.SP.800-207
systemd project. (n.d.). systemd-cryptenroll. Retrieved November 4, 2026, from https://www.freedesktop.org/software/systemd/man/latest/systemd-cryptenroll.html
Yubico. (n.d.-a). pam_u2f(8). Retrieved November 4, 2026, from https://developers.yubico.com/pam-u2f/Manuals/pam_u2f.8.html
Yubico. (n.d.-b). pamu2fcfg(1). Retrieved November 4, 2026, from https://developers.yubico.com/pam-u2f/Manuals/pamu2fcfg.1.html
Yubico. (n.d.-c). Securing SSH authentication with FIDO2 security keys. Retrieved November 17, 2026, from https://developers.yubico.com/SSH/Securing_SSH_with_FIDO2.html
Steps 1–10 describe my November 3, 2026, lab session. The optional SSH section documents the November 17, 2026, extension. External references explain the tools and security concepts; they do not independently reproduce or certify these results.
AI disclosure
I personally performed the original lab work and testing on November 3, 2026, and the optional SSH extension on November 17, 2026, using my Fedora Linux 45 lab workstation and, for SSH, one of my Windows computers at home. I used AI tools to assist with research, editing, formatting, and preparing composite illustrations from my original lab photographs. After completing the SSH tests, I also used AI to compile and format that portion of the report to save time. The commands and documented results come from work I performed, not AI-generated testing. Readers should use the written commands rather than transcribing commands from the illustrations. The results, conclusions, and any errors remain my responsibility.



 You helped testing Fedora 50 i18n features
 You helped testing Fedora 49 i18n features
 You helped testing Fedora 48 i18n features
 You helped testing Fedora 47 i18n features
 You helped testing Fedora 46 i18n features
 You helped solidify the core for the Fedora 50 rebase!
 You helped solidify the core for the Fedora 49 rebase!
 You helped solidify the core for the Fedora 48 rebase!
 You helped solidify the core for the Fedora 47 rebase!
 You helped solidify the core for the Fedora 46 rebase!
 You helped solidify the core for the Fedora 45 rebase!



 So let’s see what this new release for the Fedora Atomic Desktops variants includes for Silverblue, Kinoite, Sway Atomic, Budgie Atomic and COSMIC Atomic.





 You attended the F45 Virtual Release Party!










 docker.io/deluan/navidrome:latest
 You have been a member of the EPEL Steering Committee

 You visited the Fedora booth at TXLF 2026!